Category Archives: Tech Stuff

By   July 1, 2025

I’m procrastinating on rebuilding the rear quarters.   I’ve got 6 separate and not perfectly shaped pieces I’m trying to put together so I’m in avoidance mode.   Found some battery packs at auction.  42kwh packs from a 2021 BMW i3.


Also got around to getting the transmission spinning using a 33v33A bench supply as well as a 12v3A bench supply for the controller.

Click to watch a motor spin.

Welding, cutting, banging, lather, rinse, repeat

By   June 13, 2025

I picked up some decent-ish front fenders on our recent road trip which meant I could sacrifice my existing front fenders.  The front left fender wheel arch on the rear right quarter panel, fits not too bad.   Could stand to drop a little further at the back end and I’ll have to abbreviate the front end of the arch and blend it into my ‘rockers’.  See: “Not doing a museum level restoration”.

As far as the drivetrain part of the project goes, I’ve received the controller from Ireland, a case and connectors from Aliexpress, and an inverter wiring harness from California.   Also got a throttle pedal from a Honda Fit.  I need to start crimping pins and wiring up the controller and then I should be able to spin this thing up on the engine stand.

I’ve also started documenting the wiring connections between the inverter, controller, throttle pedal, and transmission.


Tedious welding.

By   May 12, 2025

I remember when welding patches and rebuilding quarter panels was fun.  The end goal of this truck is not a restoration, but merely to have a structurally solid with non-rust-bucket vibe.  As such, I can take a few liberties with how things are put back together, but it’s no less tedious.

Rebuilding the wheel-arches is another thing altogether.  I’m trying my hand at some hammer forming with a wood/metal buck but I don’t think that’s going to turn out well.   I used a 1-7/8″ trailer hitch ball to make a forming attachment for my air-hammer.  Unfortunately, it wasn’t hardened so it just mushroomed at the end and also hardly made a dent in the sheet metal.  Back to the drawing board.

Drivetrain.

By   May 8, 2025

The pieces of my drivetrain are coming together.  What you see there is the transmission out of a Lexus LS600HL (known as an L110F), plus the transfer case from a 1992 Toyota Land Cruiser 80 series (known as an HF1A), as well as the Inverter from the Lexus LS600HL (bottom). The high voltage leads from the battery pack (I don’t have one yet) go into the inverter, and the two orange leads from the transmission plug into the inverter.  There is a separate controller (I also don’t have yet) that will talk to the inverter and tell the transmission what to do.

There will be nothing connected to the front (left side of this photo).  That’s where the V8 gas engine used to be.


By   April 18, 2025

Work continues on the FJ-55.  The passenger side A-pillar is coming together.  It’s on the rotisserie now and I seem to have acquired an L110F transmission.  An HF1A seems to fit on the back.


rat-ratgdo – Home Assistant.

By   November 25, 2024

My truck is too long.  The Ford website says 20’3″.  The space between the front and rear garage doors is 21′ even.  That doesn’t leave a lot of margin for error when driving in.

Enter Rat-ratgdo. This is a board that can link with Liftmaster/Chamberlain Security 2.0 garage door openers.  It can read the state of the door, sensors, and control the door.  With ESPHome firmware, it links easily to HomeAssistant.

I moved the obstruction sensor for the rear door up to the height of my bumper.  When the bumper clears, the rat-ratgdo obstruction sensor switches from “Problem” to “OK”.

This allows me to create an automation:

When I drive in the back door, a light in the ceiling turns on as soon as I block the obstruction sensors and turns off again when the sensors are clear.  If the light doesn’t turn on when I drive in, then I know that HomeAssistant isn’t working so then I just have to look in my rear view mirror and watch the blinking LED of the obstruction sensors which is slightly more error prone.

Re-create proxmox containers and VM’s from existing raw images.

By   November 20, 2024
  • Find your backups.
  • Extract pct.conf from backups
    • tar xvf /mnt2/mpv-pve/dump/vzdump-lxc-101-2024_11_16-00_03_50.tar.lzo ./etc/vzdump
  • Create null_template.tar.gz
for I in 105 103 102 101; do cat $I/etc/vzdump/pct.conf | grep -v ^lxc | grep -v "^#" | sed -e 's/^/\-/' -e 's/: / /' | xargs pct create $I /mnt/pve/nfs-beernas-containers/template/cache/null_template.tar.gz; done
for I in 100 120 121 122; do mkdir -p /tmp/$I; lzop -dc vzdump-qemu-$I-*.lzo | vma config - > /tmp/$I/$I.conf; done
for I in 100 120 121 122; do cat /tmp/$I/$I.conf | grep -v '#' | sed -e 's/: / /' -e 's/^/\-/' | xargs qm create $I; done

…and to avoid this pain in the future:

5 0 * * 0 touch /mnt/pve/nfs-beernas-backups/.timestamp
0 0 * * 0 find /mnt/pve/nfs-beernas-backups -name config.dump.* \! -newer /mnt/pve/nfs-beernas-backups/.timestamp -print | xargs rm
0 0 * * * sqlite3 /var/lib/pve-cluster/config.db .dump > /mnt/pve/nfs-beernas-backups/config.dump.$(date --utc +%Z%Y%m%d%H%M%S).sql

Migrating from MediaWiki to Bookstack.

By   April 21, 2024

My long relationship with MediaWiki is over.  It’s been over for a while if I’m honest.

Anyway, there’s no trivial way to import MediaWiki data into Bookstack but here’s what I did:

  1. First I installed Bookstack.
  2. Then export MediaWiki data to xml:

    php maintenance/dumpBackup.php –current –include-files > /tmp/all_pages.xml

  3. Clone https://github.com/outofcontrol/mediawiki-to-gfm

    ./convert.php –filename=/tmp/all_pages.xml –output=/path/to/converted/files

  4. Find where your images went:

    php maintenance/dumpUploads.php

  5. Clone

    https://github.com/Yetangitu/bs

  6. Go to your bookstack implementation and get an API key.
  7. Follow the instructions for ‘bs’ to configure it with your API key.
  8. use ‘bs’ to create books/chapters/pages using the data from step 3.
  9. Upload the images from step 4.
  10. A bunch of manual cleanup and reorganizing.


This is not for the faint of heart but it’s also not difficult.  Just a bit tedious.

Hateful gate controller

By   March 19, 2023

I’m essentially lazy. After installing a gate on the end of the driveway, we quickly tired of getting out of the car to open and then close the gate behind us. I bought a gate actuator which came with a couple of linear actuators and a controller. Since we don’t have wired power out there, I also needed a battery and solar panel plus charge controller.

The charge controller it came with was shit and the panel was too small, so I bought a new panel and charge controller. That solved that problem. No longer getting ‘Low Voltage’ warnings from the gate controller.

The next problem was access for friends. See the article https://www.beer.org/blog/index.php/2022/07/03/playing-with-fiducials/

Another annoyance was that if we were expecting a friend or courier or other, we had to walk down the driveway with a remote, and after getting close enough to the gate, press a combination of buttons in order for the gate to open and stay open.  Then before bedtime, we had to remember to walk down the driveway to close the gate which is particularly disquieting in the dark where a hundred reflective eyeballs are looking at you from the surrounding forest.  There was also no way to know whether the gate was actually open or closed without also going for a walk.

To help address this last annoyance, I added a VHF radio module connected to a BLE dongle and a relay module with a set of ADCs to read the limit switches.  A bit of Micropython and I could send queries to the dongle to get the state of the limit switches, and press buttons remotely.  Add in some MQTT handling and I have a link to HomeAssistant.


Unfortunately, now I have 2 boxes mounted out by the gate, one with the clunky COTS gate controller+battery, and another with the barnacles that I added to the system:

There must be a better way.  The heart of the system is the COTS controller board which is really just a couple of H bridges, some current sensing, limit switch inputs and push button inputs.  Time to start experimenting.

Playing with Fiducials.

By   July 3, 2022

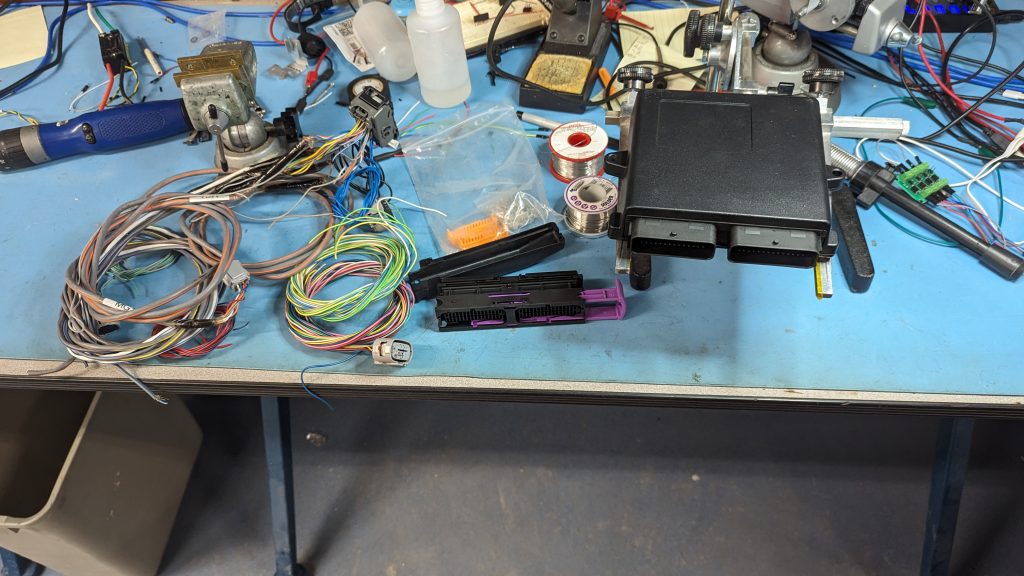
As part of some tinkering I was doing with my robotics team, I was learning about AprilTags.  Coincidentally, I had also recently installed a gate opener at the front gate and was struggling with how to organize guest access.

I grabbed my OpenMV camera, a spare buck/boost converter, and an old Axis surveillance camera housing.  Put it all together and mounted it to a post in front of the gate:

 
Google Photos Refresh Token invalid. Please authenticate from Photonic → Authentication.
Error encountered during authentication:
{
  "error": "deleted_client",
  "error_description": "The OAuth client was deleted."
}
See here for documentation.

I played with the QR Code recognition and various families of AprilTag. While the QR Code recognition worked fine and allowed me some nice flexibility in terms of content, it was more fallible under varying light conditions. AprilTags are more robust and recognized pretty quickly from a few feet away.

The code is simple:

import sensor, image, time, math, omv, utime
import pyb
import machine


thresholds = ( 150,255 )
sensor.reset()                      # Reset and initialize the sensor.
sensor.set_pixformat(sensor.GRAYSCALE)
sensor.set_framesize(sensor.QQVGA)
sensor.set_auto_gain(False)
sensor.set_auto_whitebal(False)
sensor.skip_frames(time = 2000)     # Wait for settings take effect.
clock = time.clock()                # Create a clock object to track the FPS.

tag_families = image.TAG36H11|image.TAG36H11

last_tag = 0
tag_repeat_cnt = 0
tag_repeat_threshold = 5
rtc = pyb.RTC()

def set_rtc(epoch):
    dt=time.localtime(int(epoch))
    rtc.datetime(tuple(dt))


P1_PIN="P4"
P2_PIN="P5"
p1 = 0
p2 = 0

STATE_NORMAL=0
STATE_STAY_OPEN=1
STATE_STAY_CLOSED=2

state = 0
rtc_valid = 0

red_led = pyb.LED(1)
green_led = pyb.LED(2)
blue_led = pyb.LED(3)
ir_leds = pyb.LED(4)

# micropython Epoch is 2000-01-01.  My timezone is UTC+8.
epoch_fixup=946728000


def set_p1(dur=0):
    p1.low()
    red_led.on()
    time.sleep_ms(dur)
    p1.high()
    red_led.off()


def set_p2(dur=0):
    p2.low()
    green_led.on()
    red_led.on()
    if (dur == 0):
        return
    time.sleep_ms(dur)
    p2.high()
    green_led.off()
    red_led.off()

def init_gpios():
    p1=pyb.Pin(P1_PIN, pyb.Pin.OUT_PP, pyb.Pin.PULL_DOWN)
    p2=pyb.Pin(P2_PIN, pyb.Pin.OUT_PP, pyb.Pin.PULL_DOWN)
    p1.high()
    p2.high()

    return p1,p2

p1,p2 = init_gpios()
blue_led.on()

i=0
while True:
    if i > 10:
        sensor.sleep(True)
        time.sleep_ms(500)
        sensor.sleep(False)
        i = 0
    i = i+1

    img = sensor.snapshot()         # Take a picture and return the image.
                                    # to the IDE. The FPS should increase once disconnected.
    tag_list = []

    try:
        tag_list.extend(img.find_apriltags(families=tag_families))
    except (MemoryError, OSError):
        pass

    for tag in tag_list:
        if tag.id() == last_tag:
            tag_repeat_cnt = tag_repeat_cnt + 1
        else:
            tag_repeat_cnt = 0
            last_tag = tag.id()

        if tag_repeat_cnt > tag_repeat_threshold:
            if tag.id() > 1 and tag.id() < 100 and state==STATE_NORMAL:
                print("Access granted (FRIEND): {}".format(tag.id()))
                set_p1(1000)

Obviously this isn’t super secure but most people who are breaking into houses aren’t sophisticated enough to know about Fiducials. Most people will assume the camera is for someone in the house to remotely activate a switch. I am actually using somewhat different code.

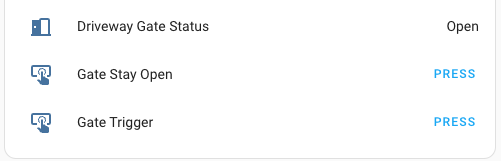
Because the only power I have out there is the deep cycle battery running the gate controller, I put the OpenMV to sleep for 1/2 second at a time. Seems to do ok and has gotten through an entire winter with temps that fell to -40C.
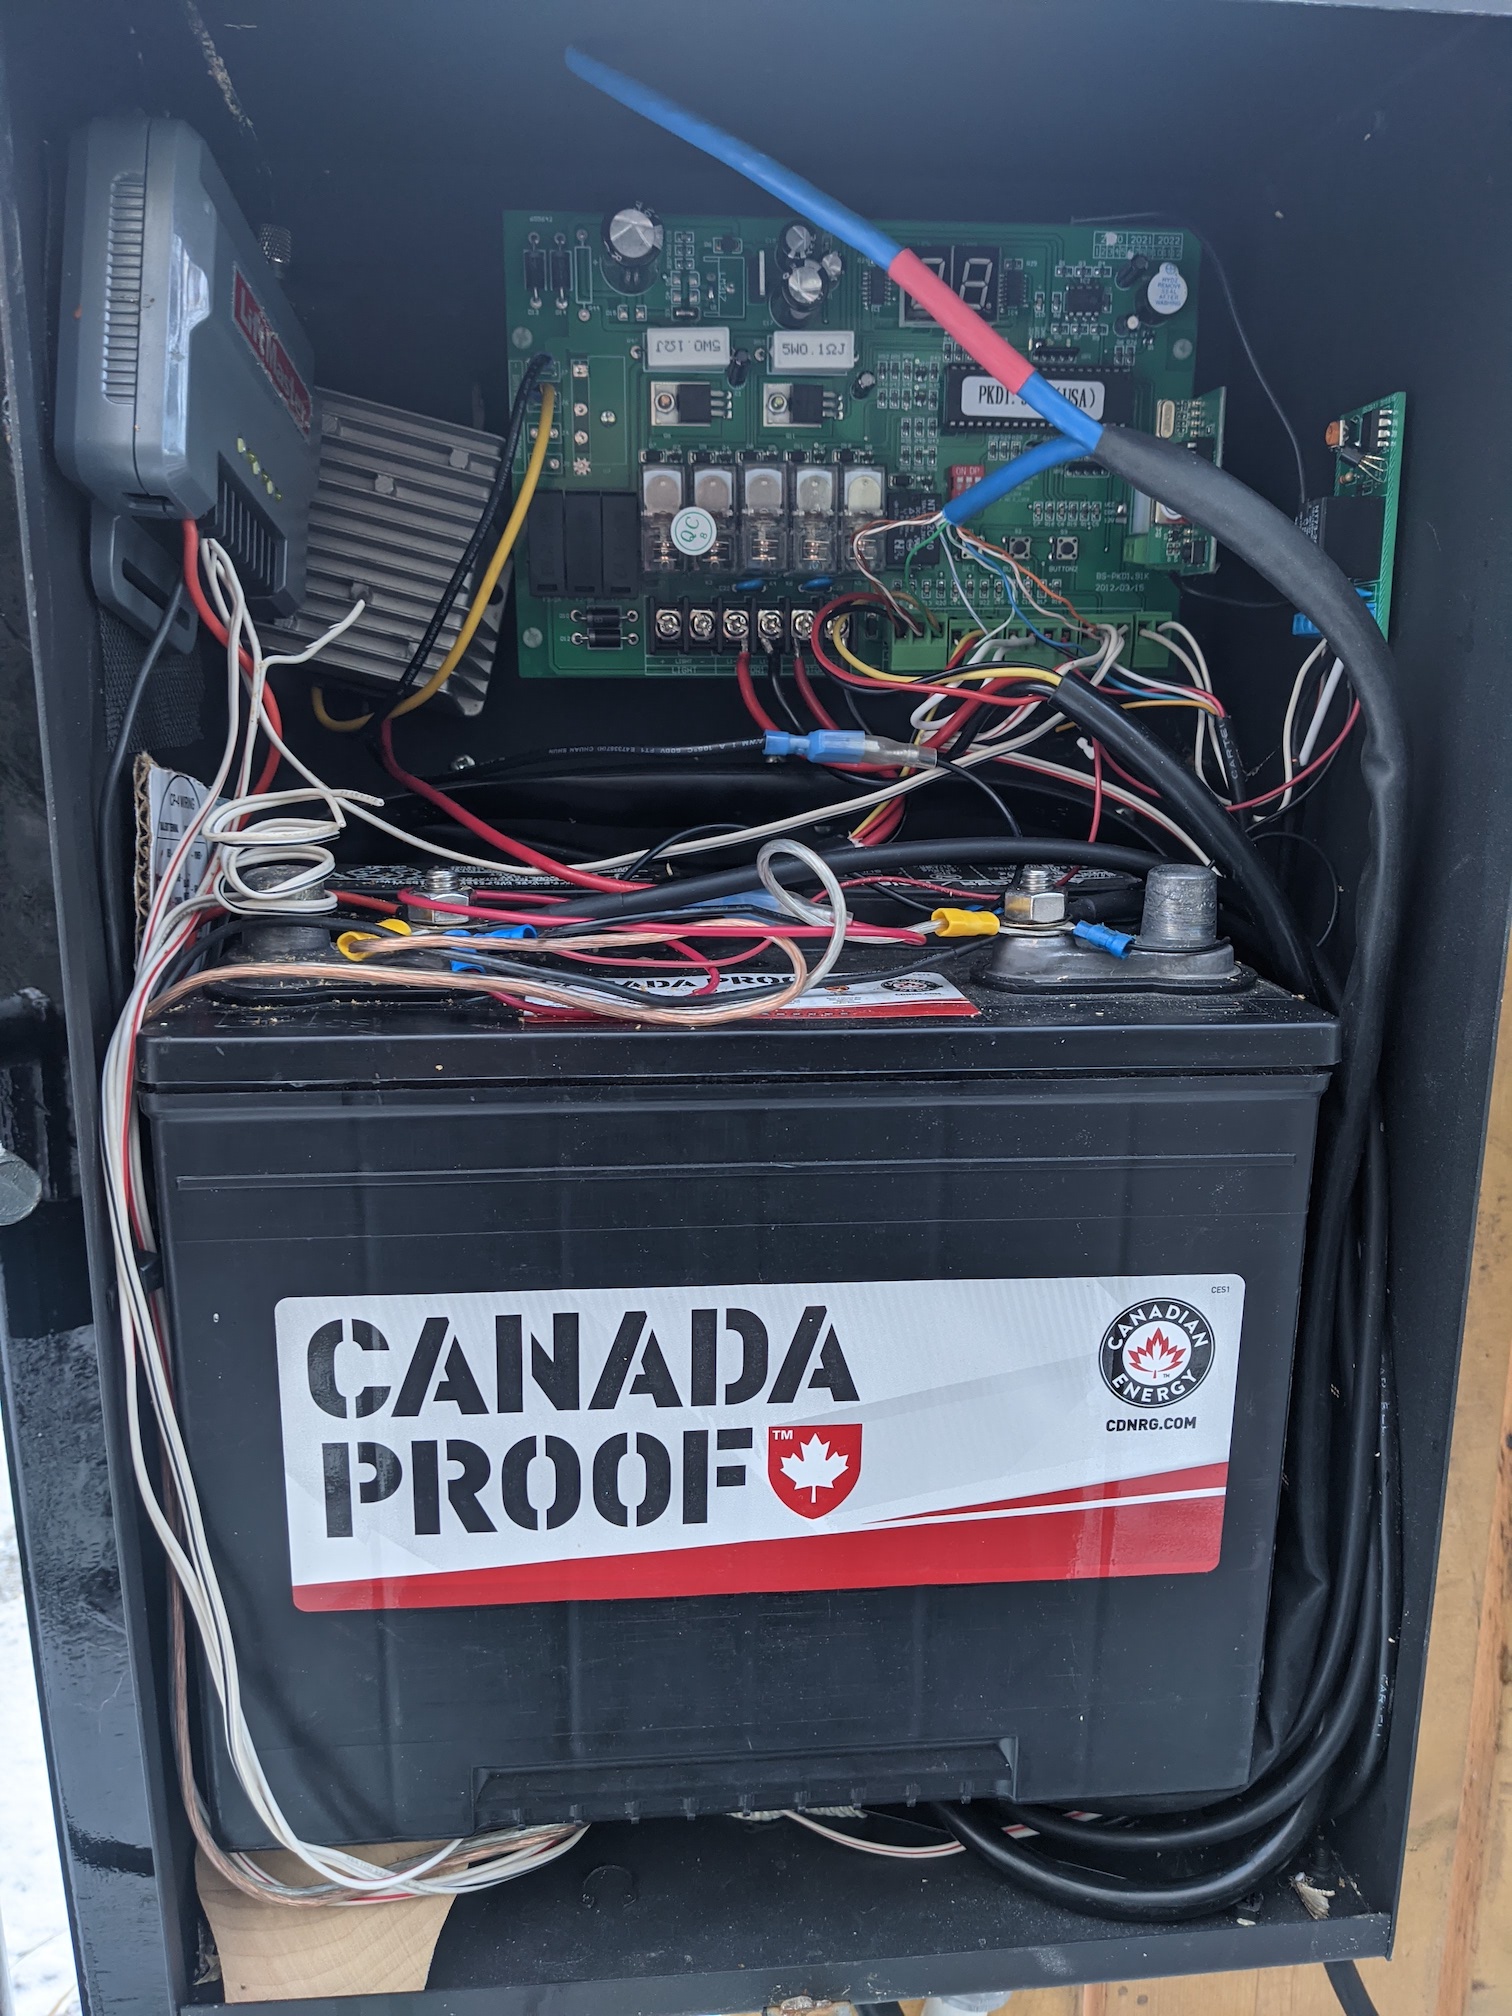
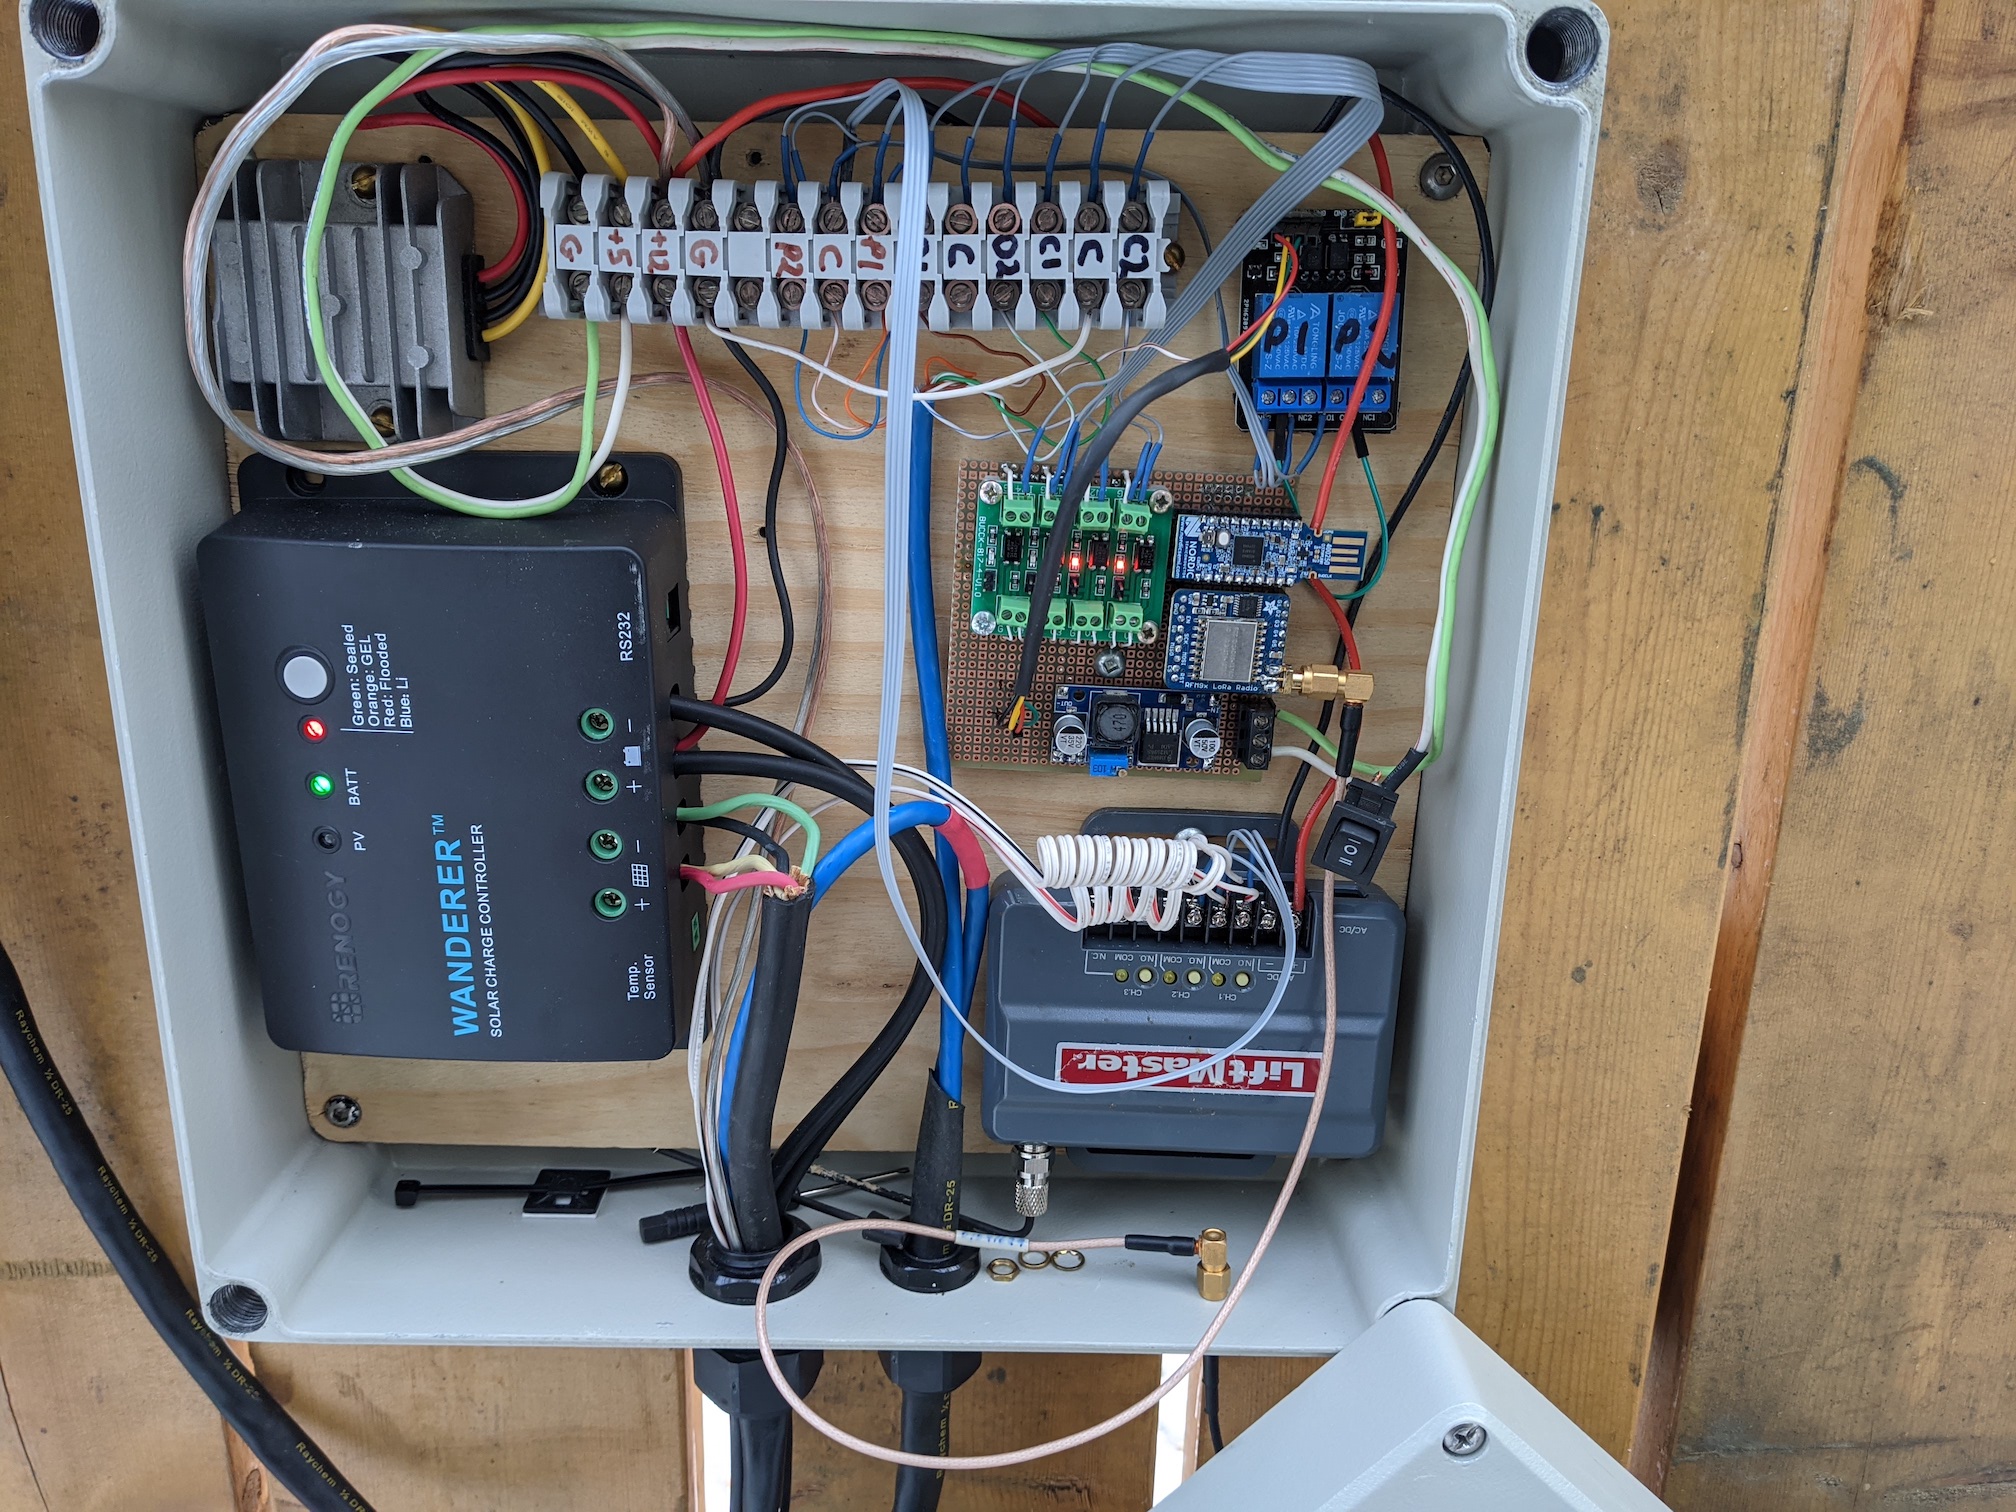