I’m essentially lazy. After installing a gate on the end of the driveway, we quickly tired of getting out of the car to open and then close the gate behind us. I bought a gate actuator which came with a couple of linear actuators and a controller. Since we don’t have wired power out there, I also needed a battery and solar panel plus charge controller.
The charge controller it came with was shit and the panel was too small, so I bought a new panel and charge controller. That solved that problem. No longer getting ‘Low Voltage’ warnings from the gate controller.
The next problem was access for friends. See the article https://www.beer.org/blog/index.php/2022/07/03/playing-with-fiducials/
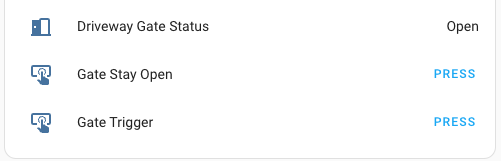
Another annoyance was that if we were expecting a friend or courier or other, we had to walk down the driveway with a remote, and after getting close enough to the gate, press a combination of buttons in order for the gate to open and stay open. Then before bedtime, we had to remember to walk down the driveway to close the gate which is particularly disquieting in the dark where a hundred reflective eyeballs are looking at you from the surrounding forest. There was also no way to know whether the gate was actually open or closed without also going for a walk.
To help address this last annoyance, I added a VHF radio module connected to a BLE dongle and a relay module with a set of ADCs to read the limit switches. A bit of Micropython and I could send queries to the dongle to get the state of the limit switches, and press buttons remotely. Add in some MQTT handling and I have a link to HomeAssistant.
Unfortunately, now I have 2 boxes mounted out by the gate, one with the clunky COTS gate controller+battery, and another with the barnacles that I added to the system: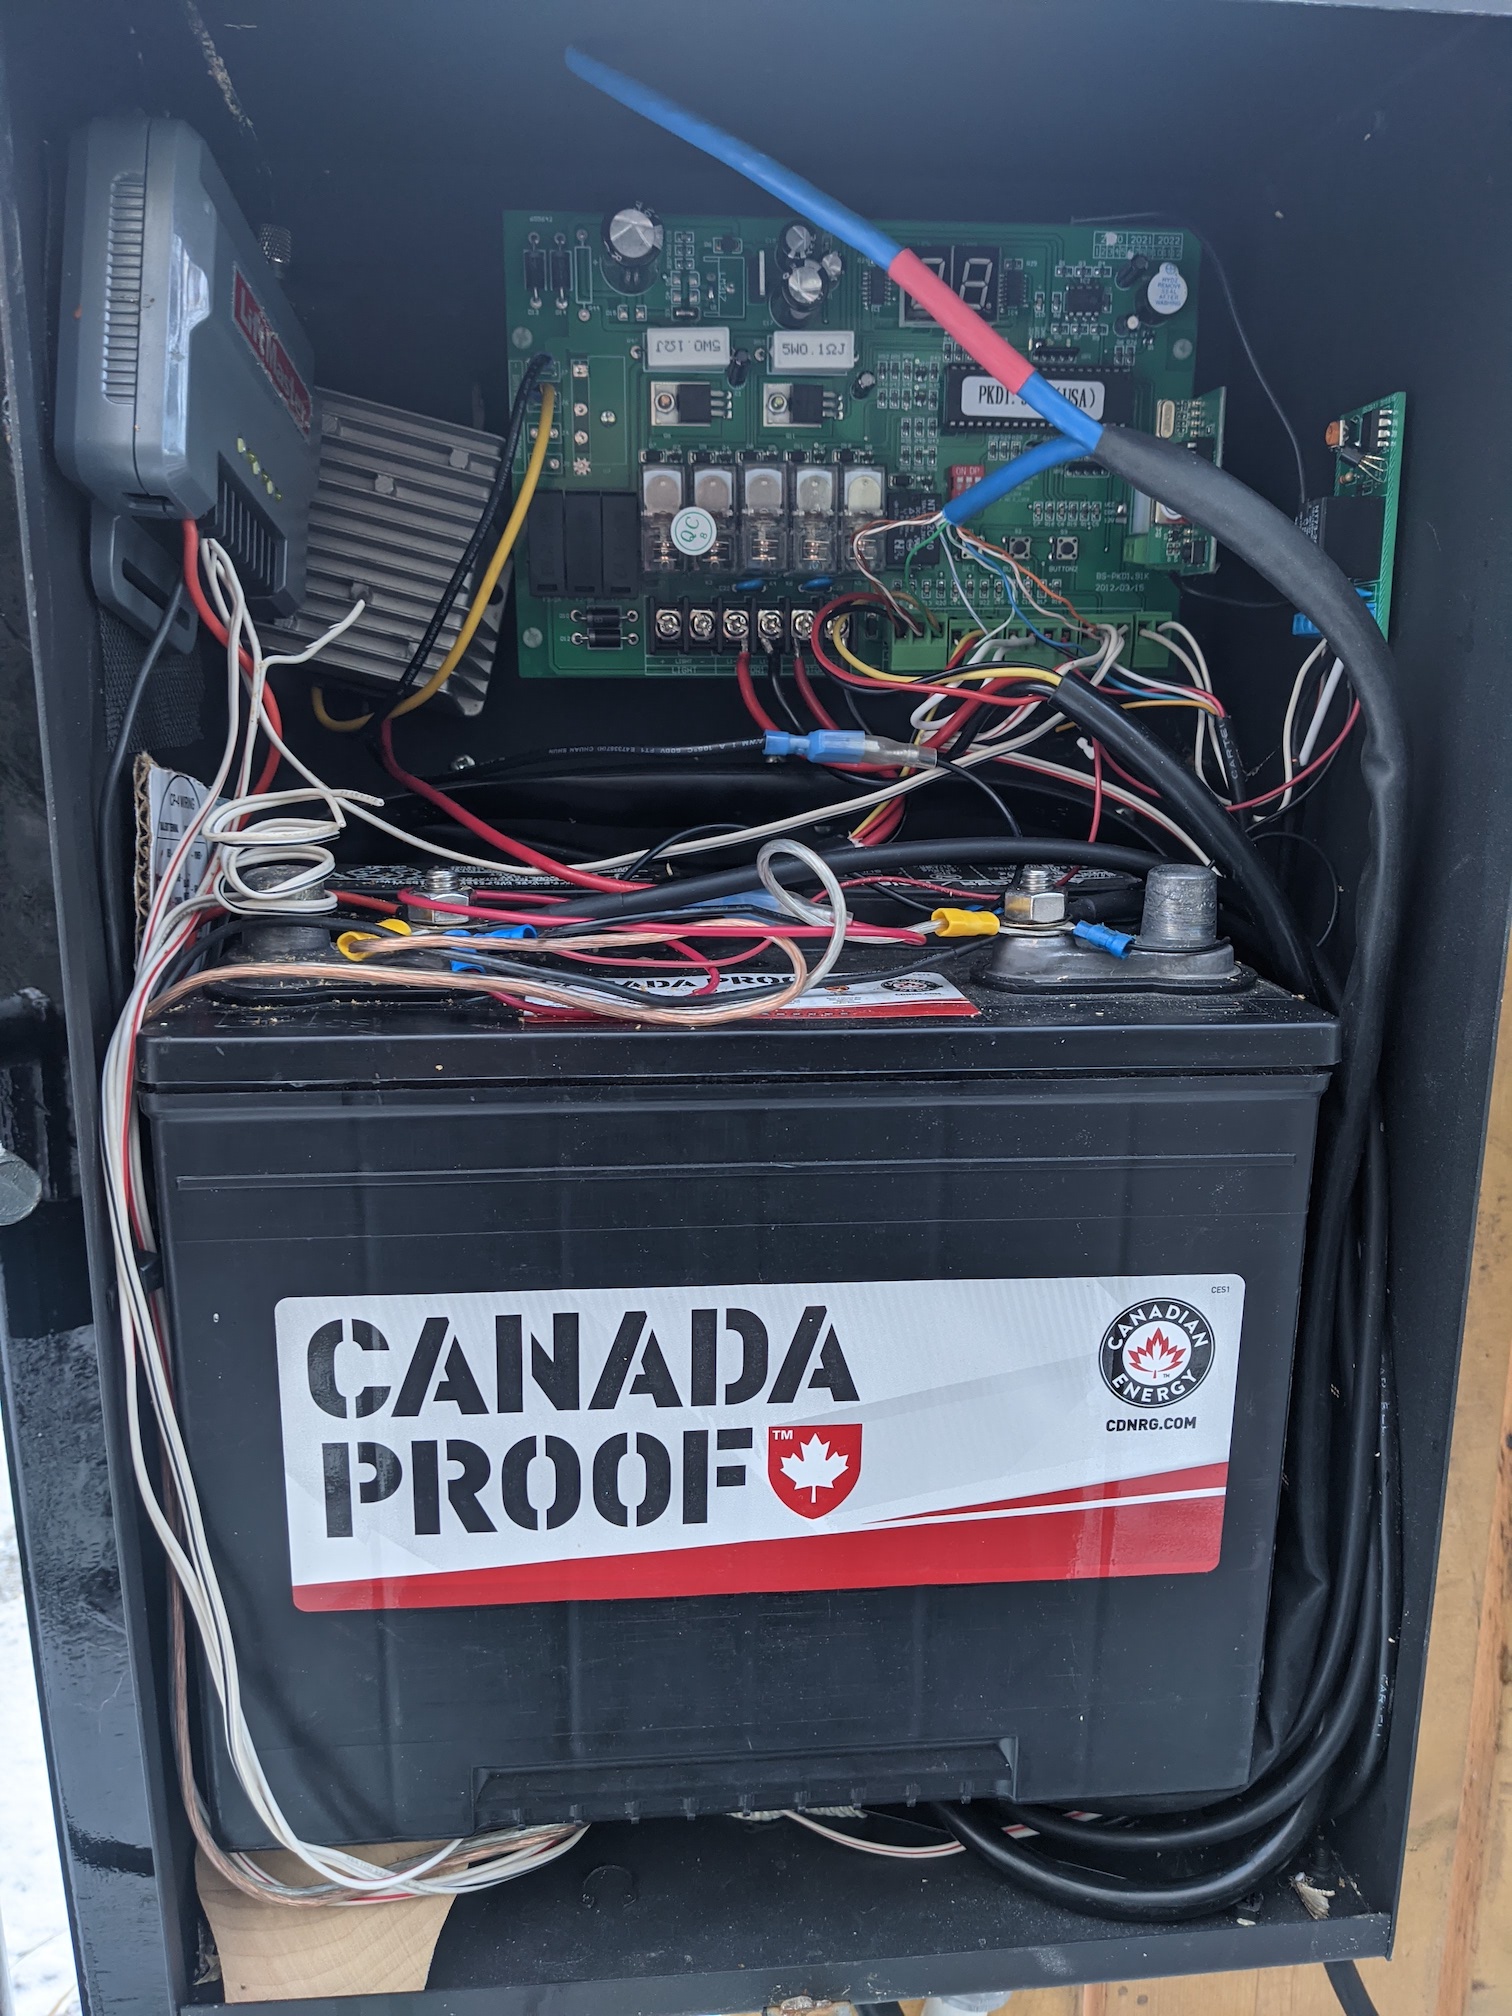
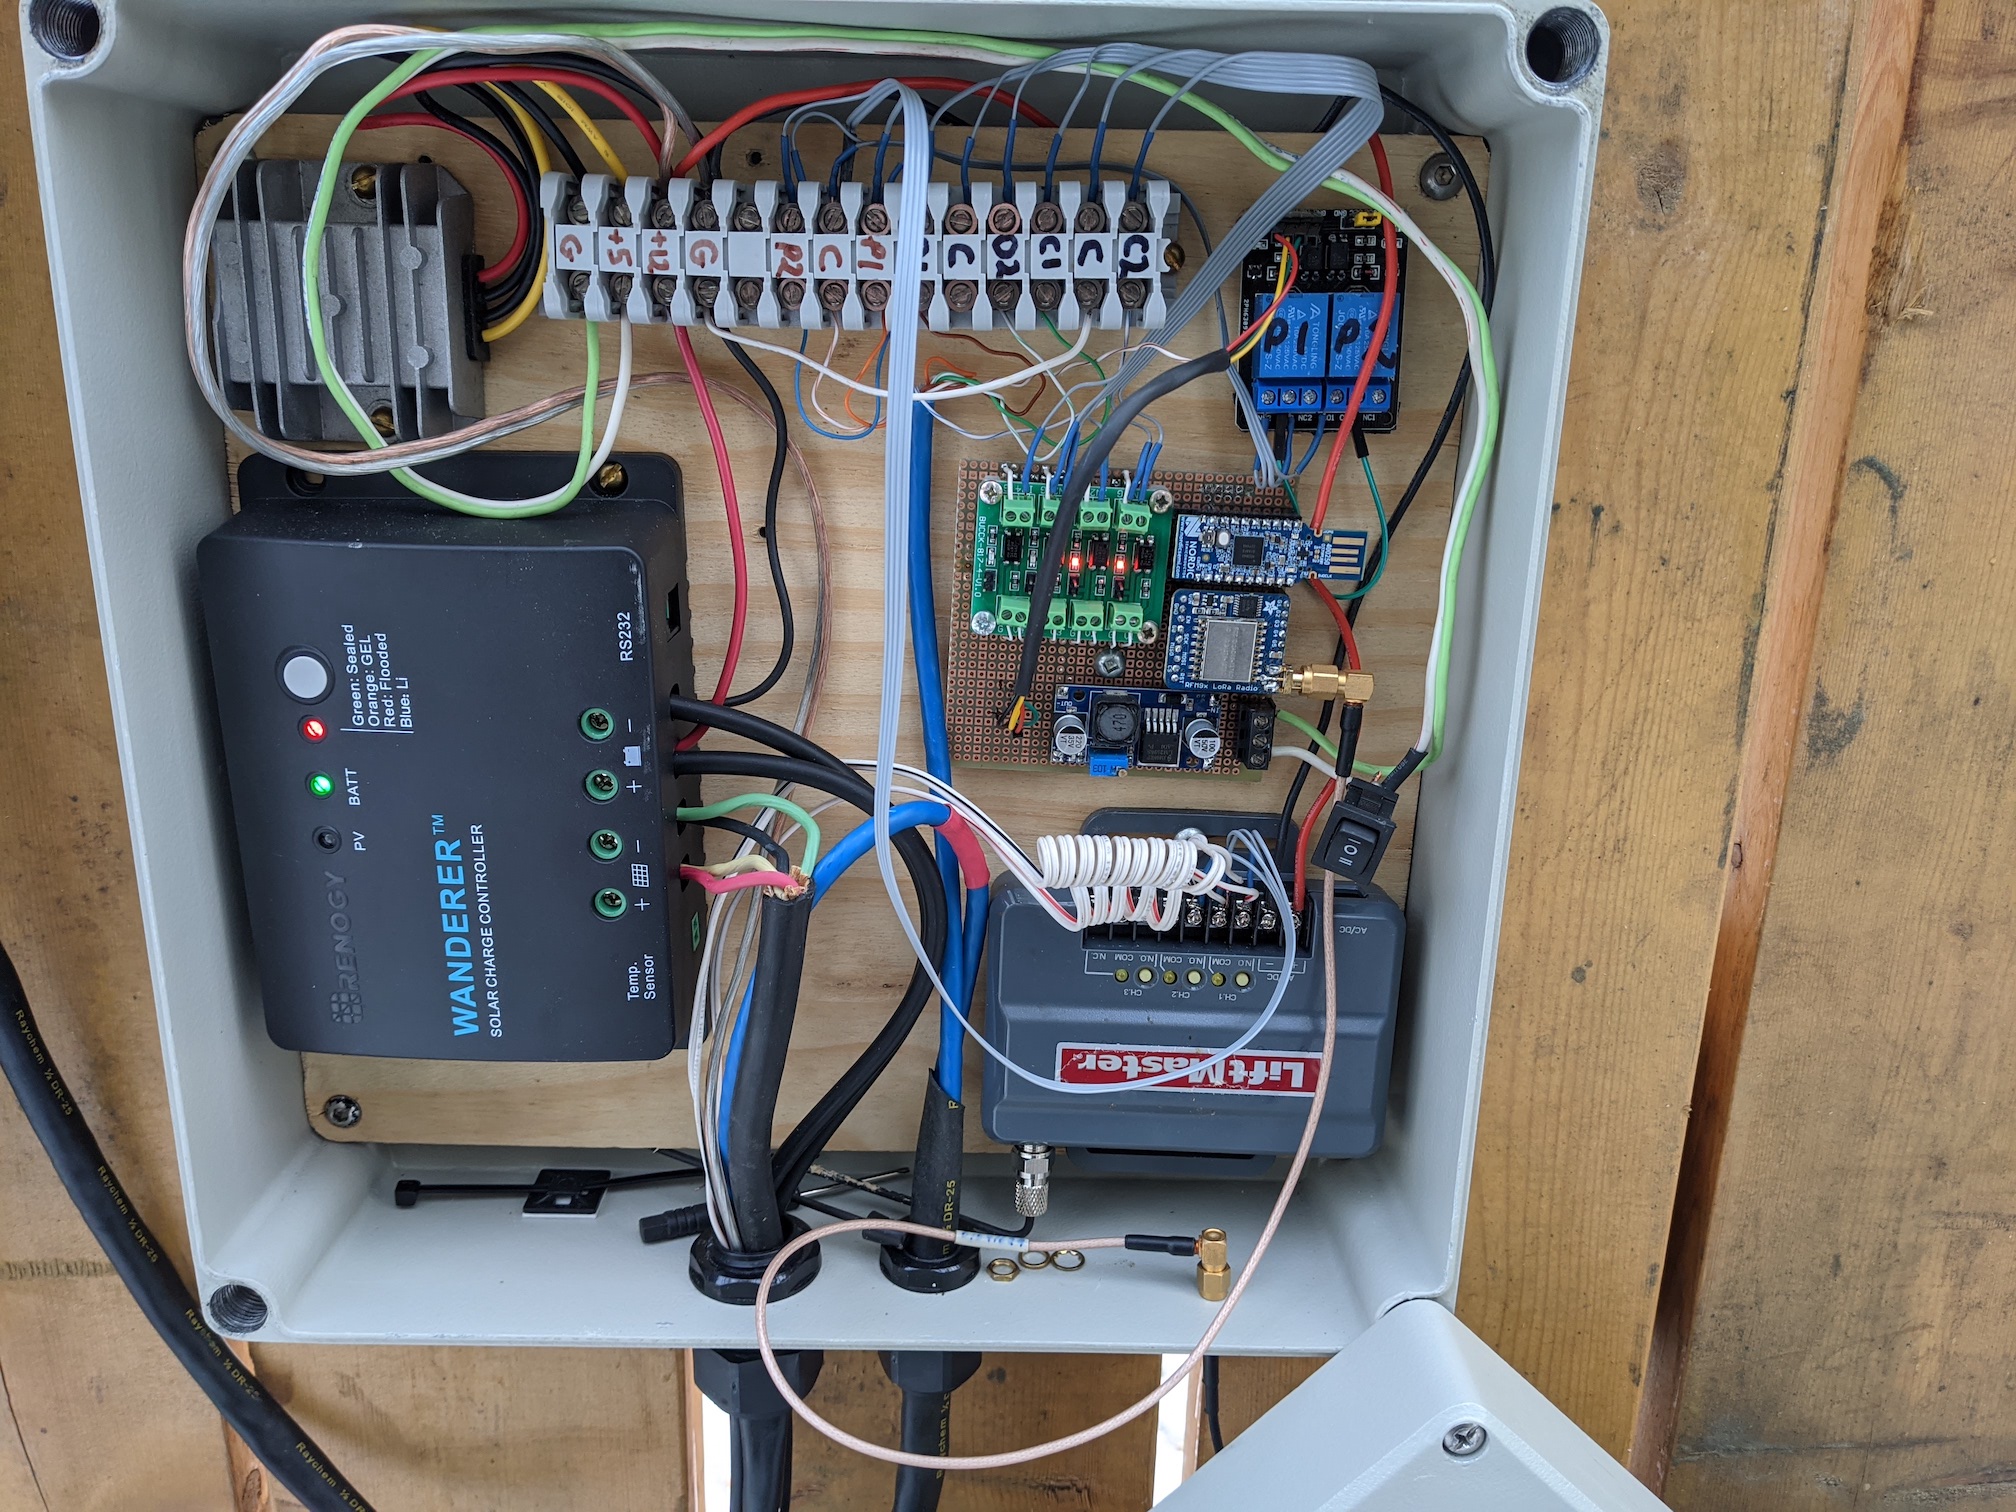 There must be a better way. The heart of the system is the COTS controller board which is really just a couple of H bridges, some current sensing, limit switch inputs and push button inputs. Time to start experimenting.